
Load Balancing 101: What It Is and How to Set It Up (Beginner-Friendly Guide)
In today’s digital world, website performance, speed, and uptime are critical. If your website gets high traffic or runs important applications, relying on a single server can lead to slow performance or even downtime.
This is where load balancing comes in , a powerful solution that ensures your website stays fast, stable, and always available.
In this guide, you’ll learn what load balancing is and how to set it up step-by-step.
What is Load Balancing?
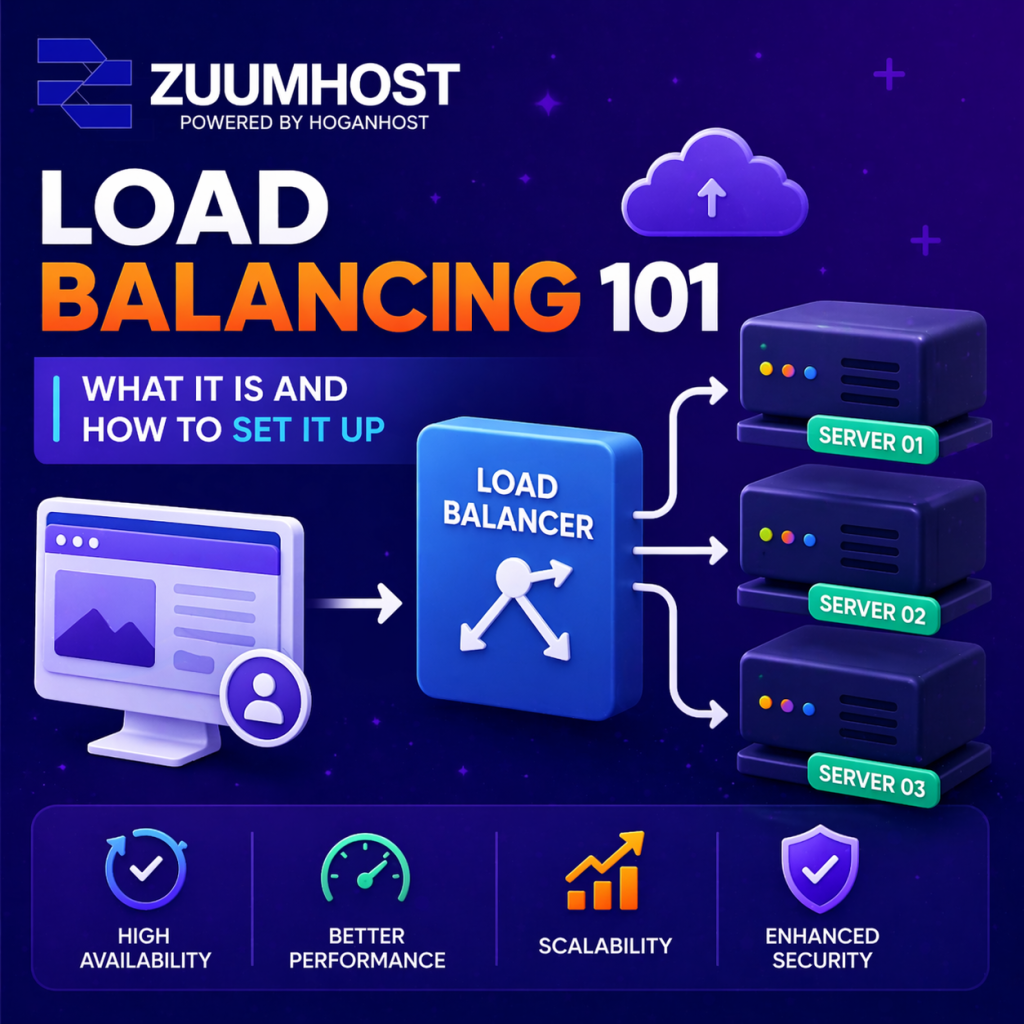
Load balancing is the process of distributing incoming traffic across multiple servers instead of relying on just one.
Think of it like sharing workload among multiple workers instead of one person doing everything. This ensures better performance and prevents overload.
A load balancer acts as a “traffic manager,” directing users to different servers efficiently.
Why Load Balancing is Important
Here are the key benefits:
1. High Availability
If one server fails, traffic is automatically redirected to another server, reducing downtime.
2. Improved Performance
Traffic is shared across servers, making websites faster and more responsive.
3. Scalability
You can easily add more servers as your traffic grows.
4. Better Security
Load balancers help absorb malicious traffic and reduce the risk of attacks.
5. Easy Maintenance
You can update or fix one server without affecting users.
Types of Load Balancers
There are different types depending on your needs:
1. Hardware Load Balancers
- Physical devices
- Very powerful but expensive
2. Software Load Balancers
- Installed on servers (e.g., NGINX, HAProxy)
- Flexible and cost-effective
3. DNS Load Balancing
- Uses multiple IP addresses for one domain
- Simple but less precise
4. Layer 4 vs Layer 7
- Layer 4: Based on IP and port (faster)
- Layer 7: Based on content like URL and headers (more advanced)
Common Load Balancing Algorithms
Load balancers use algorithms to distribute traffic:
- Round Robin – Equal distribution
- Least Connections – Sends traffic to least busy server
- IP Hash – Keeps users on same server
- Weighted Round Robin – Prioritizes stronger servers
How to Set Up Load Balancing (Step-by-Step)
Here’s a simple way to set it up using NGINX:
Step 1: Prepare Your Servers
You need:
At least 2 backend servers
1 load balancer server
Example:
Server 1: 192.168.1.10
Server 2: 192.168.1.11
Load Balancer: 192.168.1.100
Step 2: Install NGINX
On your load balancer server:
Bash
sudo apt update
sudo apt install nginx -y
Step 3: Configure Load Balancer
Open config file:
Bash
sudo nano /etc/nginx/sites-available/loadbalancer.conf
Add:
Bash
upstream backend {
server 192.168.1.10;
server 192.168.1.11;
}
server {
listen 80;
location / {
proxy_pass http://backend;
}
}
This tells NGINX to distribute traffic between servers.
Step 4: Enable Configuration
Bash
sudo ln -s /etc/nginx/sites-available/loadbalancer.conf /etc/nginx/sites-enabled/
sudo systemctl restart nginx
Step 5: Test Your Setup
- Visit your load balancer IP
- You should see responses switching between servers
Advanced Load Balancing Features
Once basic setup is done, you can add:
- SSL Termination – Handle HTTPS at load balancer
- Health Checks – Automatically remove failed servers
- Sticky Sessions – Keep users on same server
- Caching & Compression – Improve speed
Best Practices for Load Balancing
To get the best results:
- Always use at least 2 servers
- Monitor performance with tools
- Secure your servers with firewall & SSL
- Plan for scaling
- Test failover regularly
Final Thoughts
Load balancing is essential for any modern website or application that needs speed, reliability, and scalability.
By distributing traffic across multiple servers, you reduce downtime, improve performance, and create a better experience for your users.
Whether you’re running a small website or a large platform, implementing load balancing is a smart step toward building a strong and scalable infrastructure.
That’s it!
Get Started with Cpanel Hosting: Order Now
Get Started with Cpanel Offshore: Order Now
Get Started with Reseller Hosting: Order Now